
Fallout 4 Cheat Codes
While playing the game, press ~ to display the console window. Note: You may first need to change your keyboard layout to “US” to use this function. Then, type one of the following codes and press [Enter] to activate the corresponding cheat function:
| Result | Cheat Code |
| God mode | tgm |
| Invincibility to damage | tdm |
| Gain one level | player.advlevel |
| Set level | player.setlevel [level] |
| Toggle no clipping | tcl |
| Buddha mode | tim |
| Show all places on map | tmm 1 |
| Kill targeted NPC | kill |
| Set “carryweight” variable | player.modav carryweight [number] |
| Toggle AI | tai |
| AI completely ignores you | tdetect |
| Toggle attacks from NPCs | tcai |
| Resurrects targeted NPC | resurrect |
| Resurrect indicated creature everywhere | resurrect [id] |
| Kill indicated creature everywhere | kill [id] |
| Fully activate all Pip-Boy map markers | tmm 1 |
| Kill all NPCs and creatures in the area | killall |
| Complete every part of main storyline | caqs |
| Teleport to cheat room with boxes containing every item | coc qasmoke |
| Teleport to indicated cell | coc [cell edid] |
| View ID of indicated object | help [text] |
| Add item to your inventory | player.additem [object id] [amount] |
| Lists inventory with object IDs | player.showinventory or player.inv |
| Equip item from the inventory | player.equipitem [object id] |
| Change your character’s gender | sexchange |
| Set minimum jump height | setgs fJumpHeightMin [number] |
| Set running speed multiplier | player.setav speedmult [number] |
| Set actor value to specific amount | player.setav [variable] [amount] |
| Modify an actor value | player.modav [variable] [amount] |
| Set a value | player.forceav [variable] [amount] |
| Advance a point on specific skill branch | advancepcskill [advskill] |
| Set the scale of targeted object | setScale |
| Display the scale targeted object | getScale |
| Unlock targeted locked object | unlock |
| Lock targed object with indicated lockpick difficulty | lock [number] |
| Activate targeted object normally used with a switch | activate |
| Delete targeted object | zap |
| Permanently delete targeted object | markfordelete |
| Set activation state of targeted object; “0” is close and “2” is open | setopenstate [0 or 2] |
| Claim ownership of targeted object | setownership |
| Spawn item next to player; stack value of “1” required for some items | player.placeatme [object id] [stack amount] [quality] |
| Move to indicated item within the same location cell | player.moveto [ref id] |
| Set how fast time passes; default is “30” | set timescale to [scale] |
| Set the game hour to indicated value | set gamehour to [time] |
| Free-roam camera | tfc |
| Toggle visible menus and UI | tm |
| Display current game time | getcurrenttime |
| View game settings value | getgs [string] |
| Send console output to indicated file | scof [filename] |
| Execute list of commands from text file | bat [filename] |
| Clear console text | cls |
Duplicate items
This glitch allows you to duplicate anything you can drop from your inventory. It also lets you get unlimited S.P.E.C.I.A.L. points (attribute points) to max out all your special skills (strength, perception, etc.) by duplicating the “You’re Special!” magazine. The “You’re Special!” magazine can be found inside your old house in Sanctuary, on the floor in Shaun’s room. This basically gives you unlimited everything: infinite weapons, ammo, mini-nukes, fusion cores, attribute points, junk items, and even money when you resell all this stuff. To duplicate items, drop the item you want to duplicate from your inventory (so it is sitting on the ground). Command your dog companion (Dogmeat) to fetch it. Pick it up at the exact same time when he is lowering his head to pick it up. If done correctly, one copy will be placed in your inventory, while Dogmeat drops another after 2-3 seconds. Repeat this as many times as desired. If you are having any trouble duplicating items, first send Dogmeat away before commanding him to pick up the item to ensure you are able to do it correctly. Note: This glitch was performed on an unpatched version of the game. It will probably eventually get patched. To avoid not being able to use this exploit, either do not install new patches before using this exploit or delete the patches. You can avoid patches being installed by disconnecting from the internet until you are ready for the game to install new patches.
Infinite caps and items
Find a vendor with any type of ammo. Choose to buy all rounds of one ammo type (you may need to choose the top ammo selection) from the vendor, but do not confirm the trade. Sell back only 1 of the rounds you just bought, but again do not confirm the trade. Then, sell back all remaining rounds and confirm the trade. The one round of ammo will glitch and stay with you. Keep selling it back to the vendor until the vendor’s caps are depleted. Next, keep buying back all of the vendor’s rounds. Finally, buy any items desired from the vendor and accept the trade. You can then sleep for 24 hours and the vendor will have all their caps back. Repeat this process as many times as desired. Note: This glitch was performed on an unpatched version of the game. It will probably eventually get patched. To avoid not being able to use this exploit, either do not install new patches before using this exploit or delete the patches. You can avoid patches being installed by disconnecting from the internet until you are ready for the game to install new patches.
Infinite XP
First, join the Brotherhood Of Steel, which can be done immediately after the game starts. You can join by going to Cambridge Police Station or just following the main story. Either way triggers the “Reveille” and “Fire Support” quests. Follow the Brotherhood’s quest line until they make you a member. Then, complete their “Tour Of Duty” quest, where you will meet everyone on the airship. Next, make sure to have a high-damage Sniper Rifle with a long-range scope (should be 50+ damage, which can be bought from vendors in Diamond City or Bunker Hill). After joining the Brotherhood Of Steel, travel to Prydwen (their airship headquarters), and talk to Proctor Quinlan. Choose to assist on a patrol, and he will give you the “Learning Curve” quest. After activating the quest, go to the deck of the airship. Make sure to set the difficulty to Very Easy. Instead of doing the quest the normal way, you can shoot the Brotherhood ally you are supposed to protect right from the airship, and it will end the quest. He dies with 1-4 headshots on the Very Easy difficulty. After killing your ally, the quest immediately ends, but you still get to keep the reward for the quest. Make sure you crouch and are “hidden” before firing a shot and remain hidden before taking a single step or the guards will kill you since you have just killed one of their members below. Then, return to the quest giver for your XP. He will give you the exact same quest again. Repeat this as many times as desired. Each run takes approximately 90 seconds with loading times if you can kill the target in one hit (use strong .50 caliber sniper rifle). If your Intelligence level is at 11, you will get approximately 419 XP for completing the quest, plus 42XP for killing the target. That is 461 XP in 90 seconds or 3,073 XP in 10 minutes if all goes smoothly. Even with less Intelligence, you can still easily score around 2,500 XP in 10 minutes. Use this method to quickly reach Level 50 and get the “Legend Of The Wastes” achievement.
Infinite inventory space (no weight limit)
To get unlimited inventory space for your companion, instead of trading with your companion, simply command them to pick up the item for you. Companions will never be overburdened using this trick. If your own inventory is too full, just drop some heavy objects on the ground and have your companion pick them up. This is especially helpful when you find some good loot but cannot carry more weight, or if you do not want to burden yourself with heavy weapons. This trick allows you to always bring some mini-nuke launchers (Fat Mans), rocket launchers, and mini-guns to fights without having to worry about their weight.
Easy Cryolator weapon early in game
Once you have Dogmeat as your companion, which will be within the first 45 minutes of starting the game, go to Vault 111 and take the elevator down. Once the elevator opens, proceed forward and through the “Exit Zone” door. Proceed forward through the hallway until you reach the first open door on the right. Enter that room, and go to the small room on the left, with the door open. There is a Cryolator Case on the wall. Normally, you would need to be at least Level 18 and have the Master Lockpick perk to open the case. Instead, call your dog over to the small room with the Cryolator, then select “Talk”, “Fetch”, and “Items” to get Dogmeat to fetch the Cryolator from the case. Next, go up to Dogmeat and select “Command”, “Stay”, and “Trade” to get 200 Cryo Cell for the weapon. You can easily get more ammo for the gun from vendors by using the “Infinite caps and items” glitch. The Cryolator is a submachine gun with good range that freezes enemies and inflicts a lot of damage. The stats for it are 20 damage, 90 fire rate, 71 range, 66 accuracy, 13.2 weight, and 302 value. It is considered one of the best weapons in the game. Note: This glitch was performed on an unpatched version of the game. It will probably eventually get patched. To avoid not being able to use this exploit, either do not install new patches before using this exploit or delete the patches. You can avoid patches being installed by disconnecting from the internet until you are ready for the game to install new patches.
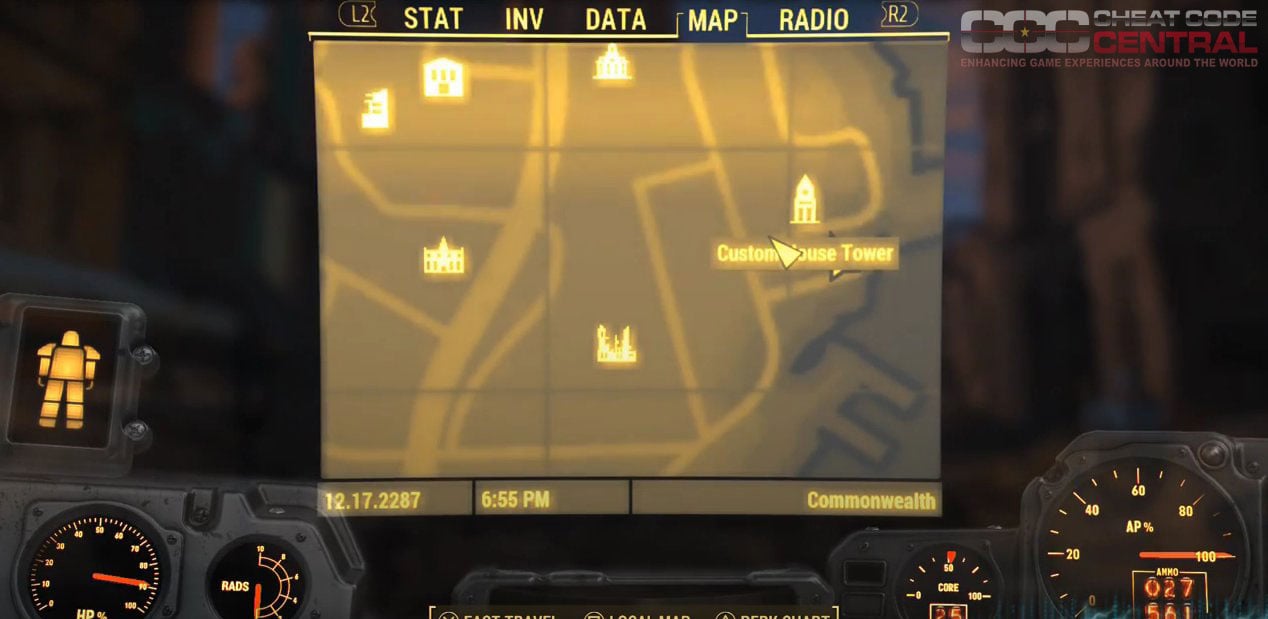
To find the full set of X-01 Power Armor, you must be Level 28+. It is located in the 35 Court (green) building, just south of Custom House Tower. Once inside the building, take the elevator up. Exit the elevator, and go right and proceed up to the next level. You will then encounter the Sentry Bot. Destroy the Sentry Bot, then press the button in the two doors that opened to open the door with the Power Armor, in the middle of the room. You can upgrade it up to “Mk. VI” at any Power Armor station, which will further increase the armor rating. X-01 is the strongest set of Power Armor in the game. You are guaranteed to get the full set at this location if you are Level 28 or higher. If you are under Level 28, you will find a weaker armor such as the T-45. Thus, do not go there before reaching Level 28.
Unique weapon locations
The following unique weapons can be purchased from vendors, obtained after completing specific quests, or looted from certain enemies.
2076 World Series Baseball Bat
- Bonus: Minor chance of flying targets.Location: Jamaica Plain City Hall reward.
Ashmaker
- Bonus: Minor chance of igniting targets.Location: Side with Fahrenheit during “The Big Dig” quest.
Automatic Laser Musket
- Bonus: Automatic fire.Location: Acquired during “The Nuclear Option” Minutemen quest.
AX90 Fury
- Bonus: +50 increased damage against Super Mutants.Location: Purchase from Teagan in the Prydwen.
Big Boy
- Bonus: Fire an extra projectile.Location: Purchase from Arturo at Diamond City.
Big Jim
- Bonus: +20 chance of crippling target’s legsLocation: Found inside Walden Pond.
Broadsider
- Bonus: Unknown.Location: Successfully complete the “Last Voyage Of The U.S.S. Constitution” quest.
Death From Above
- Bonus: ADS with +75 increased movement speed.Location: Reach Paladin and buy it from Proctor Teagan.
Deathclaw Gauntlet
- Bonus: n/aLocation: Successfully complete the “Devil’s Due” optional side-quest.
Deliverer
- Bonus: n/aLocation: Successfully complete the “Tradecraft” Railroad quest.
Eddie’s Peace
- Bonus: Additional limb damage.Location: Found during Detective Case Files: “Long Time Coming”.
Experiment 18-A
- Bonus: +25 increased rate of fire and +15 reload speed.Location: Purchase from the Institute Requisitions in the Institute.
Final Judgment
- Bonus: +25 increased rate of fire and +15 reload speed.Location: Acquired from Elder Maxson during the “Airship Down” Institute quest or “Precipice Of War” Railroad quest.
Furious Power Fist
- Bonus: Increased damage on the same target with each hitLocation: Remove the threat of Swan in Boston Common.
General Chao’s Revenge
- Bonus: +50 damage against robots.Location: Purchase from Trudy in the Drumlin Diner.
Good Intentions
- Bonus: Cause frenzy with critical hits.Location: Acquired from Clint Elevated Freeway Camp.
Grognak’s Axe
- Bonus: Cause stagger and increased damage with bleed.Location: Inside a display case in Hubris Comics.
HalluciGen Gas Grenade
- Bonus: Cause frenzy for 60 seconds.Location: Craft it using the material inside the basement laboratory of HalluciGen, Inc.
Homing Beacon
- Bonus: Zao’s sub missile strike.Location: Successfully complete the “Here There Be Monsters” quest.
Institute Beacon
- Bonus: Spawn Synths at beacon’s locationLocation: Successfully complete the “Airship Down” Institute quest.
Junk Jet
- Bonus: Unknown.Location: Located in the ArcJet Systems during the “Call To Arms” Brotherhood Of Steel quest.
Justice
- Bonus: Cause stagger chances.Location: Purchase from Penny in the Covenant.
Kellogg’s .44 Pistol
- Bonus: Fill AP with critical hits.Location: Found during the “Reunions” main quest.
Les Fusil Teribles
- Bonus: +25 limb damage with increased recoil.Location: Found inside the Captain’s cabin in Libertalia.
Lorenzo’s Artifact
- Bonus: Push targets away with telekinesis.Location: Successfully complete Cabot House.
Old Faithful
- Bonus: 2x damage to full-HP targets.Location: Purchase from Arturo in Diamond City.
Partystarter
- Bonus: +50 damage against human.sLocation: Purchase from KL-E-O in the Goodneighbor.
Pickman’s Blade
- Bonus: Increased sneak damage and bleed effects.Location: Side with Pickman.
Prototype UP77
- Bonus: Unlimited ammo.Location: Inside a master locked safe in the University Credit Union.
Railway Rifle
- Bonus: n/aLocation: Successfully complete the “Underground Undercover” Railroad quest.
Reba II
- Bonus: +50 damage against Mirelurks and bugs.Location: Help Barney during the “Barney Rook” miscellaneous quest.
Reckoning
- Bonus: Take 15% decreased damage when static.Location: Purchase from Level 4 Workshop Merchant.
Righteous Authority
- Bonus: 2x damage on critical hits and refills Critical Meter 15% faster.Location: Successfully complete the “Call To Arms” Brotherhood Of Steel quest.
Rockville Slugger
- Bonus: 40% less Action Point cost.Location: Purchase from Moe in Diamond City.
Sentinel’s Plasmacaster
- Bonus: 2x damage to full-HP targets.Location: Purchase from Proctor Teagan after reaching Sentinel.
Shem Drowne’s Sword
- Bonus: Deal radiation damage.Location: Found during Detective Case Files: “The Guilded Grasshopper”.
Shishkebab
- Bonus: Unknown.Location: Acquired from Slag in the Blast Furnace.
Spray’n’Pray
- Bonus: Bullets explode on impact dealing 15 area of effect damage.Location: Purchase from Cricket, the caravan trader.
Survivor’s Special
- Bonus: Increased damage at low HP.Location: Murder Paladin Brandis or ask him to rejoin the Brotherhood during “The Lost Patrol” Brotherhood Of Steel quest.
The Gainer
- Bonus: Ignite targets for +15 area of effect damage.Location: Successfully complete the Vitale Pumphouse number puzzle.
The Last Minute
- Bonus: +50 limb damage.Location: Purchase from Level 4 Workshop Merchant.
Tinker Tom Special
- Bonus: Increased VATs accuracy while static.Location: Purchase from Tinker Tom in the Railroad HQ.
Virgil’s Rifle
- Bonus: +50 against Super Mutants.Location: Murder Virgil and loot it from him.
Wastelander’s Friend
- Bonus: +50 limb damage.Location: Purchase from Deb at Bunker Hill.
Wazer Wifle
- Bonus: Infinite ammo.Location: Successfully complete Shaun’s three quests.
All Bobblehead locations
Search the indicated locations to find all 20 Bobbleheads. Collect all 20 Bobbleheads to get the “They’re Action Figures” and “They’re Not Dolls” achievements. Each of these collectibles also gives you a new perk or increases one of your special skills. None of them are missable. Some require you to have completed certain quests, but you can still go back to all areas later. In your inventory under the “Misc” option, you can view exactly which ones you have found. Each Bobblehead has its own name, making it easy to keep track of them.
- 1. Perception (+1 Perception)Location: Museum of Freedom (0:05)2. Repair (Fusion Cores last 10% longer)Location: Corvega Assembly Plant (1:13)3. Science (+1 Extra Guess when hacking Terminals)Location: Malden Middle School / Vault 75 (2:04)Requirement: Loot Access Card from Gunner Commander inside this vault.4. Explosive (+15% Damage with Explosives)Location: Saugus Ironworks (5:01)5. Sneak (You are 10% harder to detect)Location: Dunwich Borers (6:19)6. Barter (Prices are 5% better)Location: Longneck Lukowski’s Cannery (8:25)7. Intelligence (+1 Intelligence)Location: Boston Public Library (9:14)8. Melee (+25% Critical Damage with melee weapons)Location: Trinity Towers (10:38)9. Strength (+1 Strength)Location: Mass Fusion Building (12:22)10. Lock Picking (Lockpicking is permanently easier)Location: Pickman Gallery (13:48)11. Speech (Vendors have 100 more Caps for bartering)Location: Park Street Station/Vault 114 (15:55)Requirement: During or after “Unlikely Valentine” main story quest. This quest starts in Diamond City.12. Energy Weapons (+25% Critical Damage with energy weapons)Location: Fort Hagen (18:24)13. Unarmed (+25% Critical Damage with unarmed attacks)Location: Atom Cats Garage (20:39)14. Endurance (+1 Endurance)Location: Posiedon Energy (21:11). If you have master lockpicking, enter through the roof. If not, enter through the drainpipe by the water.15. Agility (+1 Agility)Location: Wreck of the FMS Northern Star (22:37)16. Luck (+1 Luck)Location: Spectacle Island (23:40)17. Small Guns (+25% Critical Damage with ballistic guns)Location: Gunners Plaza (24:19)Requirement: Loot Recording Room key from Ryder inside this place.18. Big Guns (+25% Critical Damage with heavy weapons)Location: Vault 95 (25:35). High level area; set difficulty to Very Easy and run past the enemies.19. Medicine (Stimpaks heal 10% more damage)Location: Secret Vault 81 (26:41). Buy three fusion cores from Vendors to enter Vault 81. Then, talk to Bobby in the reactor room and to the Doctor on the lower deck. Leave the vault and sleep for 24 hours. Return to the Doctor, accept the quest, and follow Bobby.20. Charisma (+1 Charisma)Location: Parsons State Insane Asylum (33:08)Requirement: Must be Level 10+. Kill some guards outside the Asylum, then talk to Edward Deegan. He has four random spawn locations: Colonial Taphouse and Dugout Inn in Diamond City, Third Rail in Goodneighbor, and Bunker Hills. After talking to him, the “Special Delivery” quest will be triggered. Complete it and the follow-up quest “Emogene Takes A Lover”. This will start “The Secret Of Cabot House” quest, and gain you access to the Asylum.
Fusion Cores are needed to use Power Armor. The video below shows how to easily find 10 Fusion Cores early in the game. You can start collecting these right when the game starts. You can also buy them from vendors (for example, each Fusion Core costs approximately 500 caps in Diamond City).
There are four different Power Armor types: T-45, T-51, T-60, X-01. The video below shows how to easily find some of them early in the game. The type of armor you get depends on your character level. If you are only Level 5, chances are you will get T-45 parts, which are the weakest. If you are Level 50, you probably will get T-60 and X-01 armor. However, it is slightly random what armor type you will find in each area. Save the game before collecting parts. If you do not like the part you get, load the saved game to see if you get a different part next time. Most of the parts already have fusion cores installed. Thus, if you simply want a fusion core, you can check these locations and extract it from the Power Armor. Upgrades can be made at Power Armor stations to further improve the armor rating. Some of them require an upgraded Hacker perk for Advanced and Expert terminals. You can go to all these locations immediately when the game begins. Note: There are more armor locations than shown in the video below. Even enemies wear them, and you can loot it. There are many ways to obtain new parts, but these are just the easiest locations to get them early in the game.
Search the following locations to find Power Armor Frames:
- Crashed Vertibird at Covenant Lake; in the water, near the Vertibird.
- Crashed Vertibird at Elevated Freeway; near the Vertibird.
- Crashed Vertibird at Robotics Disposal Ground; near the Vertibird.
- Arturo in the Diamond City.
- Fiddler’s Green Trailer Estates; inside a locked trailer.
- Mass Pike Interchange; inside the Gunner Camp.
- Military APCs at Poseidon Energy Turbine Power Armor Part #18-F; near the crashed plane right next to the APCs.
- Military Armor Transport at Lexington; behind a security door and inside a train car.
- Military Armor Transport at North Wilderness; behind a security door and inside a train car.
- Military Checkpoint at Cambridge Outskirts; inside a locked cage.
- Military Convoy at Training Yard; inside the convoy trailer.
- Museum of Freedom; on the rooftop in the Minutemen quest “When Freedom Calls”.
- National Guard Training Yard; inside the National Guard Armory.
- Revere Satellite Array; on one of the dish towers.
- Purchased from Teagan in the Prydwen.
Power Armor paint
Successfully complete the indicated task to unlock the corresponding paint for the listed Power Armor:
- Minutemen paint job for T-45 Power Armor: Successfully complete the “When Freedom Calls” Minutemen quest.Railroad paint job for T-51 Power Armor: Successfully complete the “Tradecraft” Railroad quest.Atom Cats paint job for T-60 Power Armor: Successfully complete the “Atom Cats” miscellaneous quest.BOS paint job for T-60 Power Armor: Successfully complete the “Shadow Of Steel” Brotherhood Of Steel quest.Institute paint job for X-01 Power Armor: Successfully complete the “Nuclear Family” Institute quest.
Power Armor set stats
Each Power Armor part has specific stats. Note: Raider Power Armor does not support jet-pack or stealth-boy mods.
| Armor Part | Damage Resistance | Energy Resistance | Radiation Resistance | Weight | Value |
| Raider Power Helm | 100 | 50 | 150 | 14 | 50 |
| Raider Power Left Arm | 50 | 25 | 150 | 16 | 75 |
| Raider Power Left Leg | 50 | 25 | 150 | 17 | 75 |
| Raider Power Right Arm | 50 | 25 | 150 | 16 | 75 |
| Raider Power Right Leg | 50 | 25 | 150 | 17 | 75 |
| Raider Power Torso | 200 | 100 | 300 | 22 | 100 |
| T-45 Helm | 100 | 60 | 150 | 12 | 60 |
| T-45 Left Arm | 50 | 30 | 150 | 15 | 100 |
| T-45 Left Leg | 50 | 30 | 150 | 15 | 100 |
| T-45 Right Arm | 50 | 30 | 150 | 15 | 100 |
| T-45 Right Leg | 50 | 30 | 150 | 15 | 100 |
| T-45 Torso | 200 | 130 | 300 | 20 | 140 |
| T-51 Helm | 140 | 90 | 150 | 12 | 80 |
| T-51 Left Arm | 90 | 60 | 150 | 15 | 130 |
| T-51 Left Leg | 90 | 60 | 150 | 15 | 130 |
| T-51 Right Arm | 90 | 60 | 150 | 15 | 130 |
| T-51 Right Leg | 90 | 60 | 150 | 15 | 130 |
| T-51 Torso | 240 | 160 | 300 | 20 | 180 |
| T-60 Helm | 180 | 120 | 150 | 12 | 120 |
| T-60 Left Arm | 130 | 85 | 150 | 15 | 160 |
| T-60 Left Leg | 130 | 85 | 150 | 15 | 160 |
| T-60 Right Arm | 130 | 85 | 150 | 15 | 160 |
| T-60 Right Leg | 130 | 85 | 150 | 15 | 160 |
| T-60 Torso | 280 | 185 | 300 | 20 | 200 |
| X-01 Helm | 220 | 140 | 150 | 12 | 140 |
| X-01 Left Arm | 170 | 110 | 150 | 15 | 200 |
| X-01 Left Leg | 170 | 110 | 150 | 15 | 200 |
| X-01 Right Arm | 170 | 110 | 150 | 15 | 200 |
| X-01 Right Leg | 170 | 110 | 150 | 15 | 200 |
| X-01 Torso | 320 | 210 | 300 | 20 | 280 |
Companions
After getting a companion to like you well enough, you will earn a bonus perk. Note: Dogmeat’s perks are already unlocked in the Charisma tree. To increase your relationship level, travel with a companion more often and do not perform actions that they do not like. Send them away before you have to complete actions that are objectionable. However, they can see you through walls and windows. After reaching maximum relationship level, you will have a final dialogue option before earning their special perk. To increase your chances, save the game before making the final dialogue choice.
Codsworth
- Location: Sanctuary.Positive actions: Donating items, healing Dogmeat, modifying armor and weapons.Negative actions: Speech success, lockpicking and stealing, pickpocketing, killing non-hostile NPCs, Chem usage and addiction.Special perk: Robot Sympathy. +10 damage resistance against all robot weaponry.
Deacon
- Location: Old North ChurchPositive actions: Donating items, hacking computers, healing Dogmeat, picking locks, pick lock owned, Speech success.Negative actions: Killing non-hostile NPCs, eating dead bodies, Chem usage and addiction.Special perk: Cloak Dagger. Deal +20 increased stealth damage and +40 stealth duration.
Dogmeat
- Location: Red Rocket Truck Stop.
Nick Valentine
- Location: Vault 114 (Park Street Station). Successfully complete his “Long Time Coming” side-quest.Positive actions: Donating items, hacking computer, healing Dogmeat.Negative actions: Stealing, pickpocketing, pick lock owned, killing non-hostile NPCs, eating dead bodies, Chem addiction.Special perk: Close to Metal. Gain an additional guess and 50% increased terminal cooldown while hacking.
Strong
- Location: Trinity Tower.Positive actions: Eating dead bodies, killing non-hostile NPCs.Negative actions: Speech success, pick lock and pick lock owned, healing Dogmeat, entering Power Armor and Vertibird.Special perk: Berserk. Deal +20 extra damage when you drop below 25 HP.
X6-88
- Location: The Institute.Positive actions: Entering Power Armor, hacking computers, modifying weapons and armor, Speech success.Negative actions: Walking around naked, healing Dogmeat, entering Vertibird, donating items, Chem usage and addiction.Special perk: Shield Harmonics. +20 energy resistance.
Romantic companions
Some companions can also become romantic interests. To start a romance, you must reach the maximum relationship with a companion, start a conversation, and choose “Romance”. Having a high Luck and Charisma will help. If successful, you will earn their special perk and can also trigger “Lover’s Embrace” by sleeping with your romantic interest to get a temporary experience point bonus. Note: To increase your relationship level, travel with a companion more often and do not perform actions that they do not like. Send them away before you have to complete actions that are objectionable. However, they can see you through walls and windows.
Cait
- Location: Encountered in the Combat Zone. Successfully complete her “Benign Intervention” side-quest. She is a master lockpicker.Special perk: Trigger Rush. Increases Action Points regeneration when below 25 HP.Positive actions: Drinking alcohol, picking locks, pick lock owned, stealing, walking around naked.Negative actions: Killing non-hostiles, eating dead bodies, donating items, Chem use and addiction.
Curie
- Location: Encountered at Vault-81. Successfully complete her “Emergent Behavior” side-quest. A robot that is useful with scientific and medical jobs and is skilled with a flamethrower.Special perk: Combat Medic. Gain 100 HP in a day after dropping under 10 HP.Positive actions: Donating items, healing Dogmeat.Negative actions: Stealing and pickpocketing, killing non-hostiles, Chem addiction.
Hancock
- Location: Encountered in the Goodneighbor. Successfully complete his “Recruiting Hancock” side-quest. A ghoul that can be very friendly or hostile depending upon your actions.Special perk: Isodoped. Deal critical hits 20% faster at 250 rads or more.Positive actions: Using Chem, donating items.Negative actions: Walking around naked, stealing, killing non-hostile NPCs.
MacCready
- Location: Encountered near the third rail in the Goodneighbor. Successfully complete his “Long Road Ahead” side-quest. An excellent sniper that can provide cover fire.Special perk: Killshot. Increases headshot accuracy in V.A.T.S. by 20%.Positive actions: Lockpicking and stealing, Speech success.Negative actions: Killing non-hostile NPCs, donating items, Chem addiction.
Paladin Dense
- Location: Encountered in the Cambridge Police Station. Gives excellent backup during combat and is a battlefield expert.Special perk: Know Your Enemy. Deals +20 bonus damage to Feral Ghouls, Super Mutants, and Synths.Positive actions: Entering Power Armor and Vertibird, modifying armor and weapons.Negative actions: Stealing and pickpocketing, pick lock owned, murdering non-hostile NPCs, eating dead bodies, using Chem.
Piper
- Location: Encountered in Diamond City. Successfully complete her “Story Of The Century” side-quest. Has good aim and can provide cover fire with a standard pistol.Special perk: Gift of Gab. Earn double experience when discovering new locations and completing Speech challenges.Positive actions: Donating items, healing Dogmeat, lockpicking.Negative actions: Stealing, pick lock owned, killing non-hostile NPCs, eating dead bodies.
Preston Garvey
- Location: Encoutnered in the Museum of Freedom. Skilled with a Laser Musket.Special perk: United We Stand. Gain +20 damage resistance and deal +20 extra damage when confronting three or more enemies.Positive actions: Donating items, modifying weapons.Negative actions: Stealing and pickpocketing, pick locked owned, killing non-hostile NPCs, eating dead bodies, Chem addiction.
Legendary weapon effects
The following legendary weapon effects are bonuses that are obtained by defeating certain Legendary enemies:
- Assassin’s: Deal 50% increased damage against humans.Automatic: Automatic fire mode.Berserker’s: Deal increased damage depending upon your damage resistance.Bloodied: Deal increased damage depending upon your health.Cavalier’s: Take 15% decreased damage while blocking or sprinting.Crippling: Deal 50% more limb damage.Enraging: Your targets frenzy with critical hits.Explosive: Your bullets to explode on impact dealing 15 area of effect damage.Exterminator’s: Deal 50% increased damage against Mirelurks and bugs.Freezing: Deal +10 cryo-damage and freeze targets with critical hits.Furious: Deal increased damage with each consecutive hit on the same target.Ghoul Slayer’s: Deal 50% increased damage against Ghouls.Hunter’s: Deal 50% increased damage against animals.Incendiary: Set targets on fire for +15 damage.Instigating: Deal double damage to full health targets.Irradiated: Deal +50 radiation damage.Junkie’s: Deal increased damage depending upon the withdrawal effects.Kneecapper: 20% chance to cripple targets’ legs.Lucky Weapon: Deal double damage with critical shots with critical meters refilling 15% faster.Medic’s: Heals targets instead of dealing damage to them.Mutant Slayer’s: Deal 50% increased damage against Super Mutants.Never Ending: Unlimited ammo capacity.Nimble: 75% faster movement speed while ADS.Nocturnal: Deal increased damage at night and decreased damage during the day.Penetrating: Negate 30% of the target’s damage resistance and energy resistance.Plasma Infused: Turn enemies into goo and add +10 points of energy damage.Poisoner’s: Poison targets for 10 seconds.Powerful: +25 extra damage.Quickdraw: Decrease Action Points cost by 25%.Rapid: 25% increased rate-of-fire and 15% increased reload speed.Relentless: Refill Action Points with critical hits.Sentinel’s: 15% decreased damage while static.Staggering: Stagger enemies with each hit.Stalker’s: When not in combat, increases VATS accuracy at the cost of increased Action Points.Troubleshooter’s: Deal 50% increased damage against robots.Two Shot: Shoot additional projectiles.VATS Enhanced: Increases VATS hit chances, decreases Action Points cost by 25% and 40%.Violent: Deal 25% damage and limb damage with increasing recoil.Wounding: Bleed target for +25 additional damage.
Chem effects
The following Chems can be created at a Chemistry Station and have the indicated effect:
- Addictol: Cure all addictionsBerry Mentats: Highlight all living targetsBuffjet: Slows time for 15 seconds. Strength +3, Endurance +3, Max HP +65, Max AP +35Buffout: Strength +2, Endurance +2, Max HP +50Bufftats: Strength +3, Endurance +3, Max HP +65, Perception +3Calmex: 2x sneak attack multiplier, Perception +3, Agility +3Curie’s Healthpak: HP +35, Rads -300Daddy-O: Intelligence +3, Perception +3, Charisma -2Day Tripper Luck: +3, Charisma +3, Strength -2Fury: Increase melee damage by 50%.Glowing Blood Pack: HP +40%, Rad Resist +75Grape Mentats: Buy for 10% lower, sell for 10% higher; Charisma +5Irradiated Blood: HP +50, Rads +20Jet: Slow time for 10 secondsJet Fuel: Increase AP recovery rateMed-X: Damage Resist +25Mentats: Intelligence +2, Perception +2Mysterious Serum: Damage Resist +50, Rads +36,000Orange Mentats: +10% V.A.T.S. accuracyOverdrive: +25% Critical Chance, Damage +25%Psycho: Damage +25%, Damage Resist +25Psychobuff: Damage +25%, Strength +3, Endurance +3, Max HP +65Psycho Jet: Slows time for 15 seconds, Damage +25%, Damage Resist +35, Max AP +35Psychotats: Damage +25%, Damage Resist +15, Perception +3RadAway: Rads -300Rad-X: Rad Resist +100Refreshing Beverage: Cures all addictions, HP +500, Rads -1000Skeeto Spit: Max HP +25Stimpak: HP +30%Ultra Jet: Slows time for 15 seconds, Max AP +100Vault 81 Cure: HP +50%X-111 Compound: Rads -600X-Cell: Strength +2, Perception +2, Endurance +2, Charisma +2, Intelligence +2, Agility +2, Luck +2
Additionally, you can create Syringer ammunition with the following effects:
- Berserk Syringe: Chance to frenzy target for 2 minutes.Bleed Out Syringe: 30 points of damage over 10 seconds to target.Bloatfly Larva: Chance for target to spawn a Bloatfly upon death.Endangerol Syringe: Reduce target’s damage resistance by 25% for 2 minutes.Lock Joint Syringe: Chance to paralyze target for 10 seconds.Mind Cloud Syringe: Target thinks you have vanished with a reduced chance to detect you for 30 seconds.Pax Syringe: Chance to make the target non-violent for 30 seconds.Radscorpion Venom Syringe: 40 points of damage over 10 seconds to target.Yellow Belly Syringe: Chance to cause target to flee for 30 seconds.
Settlements
Unlock a settlement’s workshop to gain control of it and influence it. Successfully complete the indicated task for the listed settlement to use it:
- Abernathy Farm: Successfully complete the “Returning The Favor” quest.Boston Airport: Successfully complete the “Shadow Of Steel” quest.Bunker Hill: Successfully complete the “The Battle Of Bunker Hill” quest.Castle: Clear the area of hostiles.Coastal Cottage: Clear the area of hostiles.County Crossing: Successfully complete the offered radiant quest.Covenant: Successfully complete the “Human Error” quest or defeat the current residents.Croup Manor: Clear the area of hostiles.Egret Tours Marina: Placate or defeat Phyllis Daily.Finch Farm: Successfully complete the “Out Of The Fire” quest.Graygarden: Successfully complete the “Troubled Waters” quest.Greentop Nursery: Successfully complete the offered radiant quest.Hangman’s Alley: Clear the area of hostiles.Jamaica Plain: Clear the area of hostiles.Kingsport Lighthouse: Clear the area of hostiles.Murkwater Construction Site: Clear the area of hostiles.Nordhagen Beach: Successfully complete the offered radiant quest.Oberland Station: Successfully complete the offered radiant quest.Outpost Zimonja: Clear the area of hostiles.Red Rocket Truck Stop: Unknown.Sanctuary Hills: Unknown.The Slog: Successfully complete the offered radiant quest.Somerville Place: Successfully complete the offered radiant quest.Spectacle Island: Clear the area of hostiles.Starlight Drive-in: Clear the area of hostiles.Sunshine Tidings Co-op: Clear the area of hostiles.Taffington Boathouse: Clear the area of hostiles.Tenpines Bluff: Successfully complete the offered radiant quest.Warwick Homestead: Successfully complete the offered radiant quest.
Magazines
The listed issues of the following magazines can be collected to gain the indicated bonus:
- You’re S.P.E.C.I.A.L.!: Typically add 5% to damage against a selection of enemies or make it easier to heal radiation damage.Astoundingly Awesome Tales: Typically add 5% to damage against a selection of enemies or make it easier to heal radiation damage.Grognak The Barbarian: Typically add to the damage dealt with melee or unarmed attacks.Guns And Bullets: Add about 5% to critical damage for each magazine.Hot Rodder: Customize Power Armor with Shark Paint, Hot Pink, and Hot Rod Flamespaint jobs.La Coiffe: Unlock The Hornet’s Nest and The Megaton hairstyles.Live & Love: Add perks to influence companions, or give you an extra boost when they are around.Massachusetts Surgical Journal: Increases limb damage by 2%.Picket Fences: Unknown.RobCo FUN!: Get Holotape games.Taboo Tattoos: Get up to five different tattoos.Tales Of A Junktown Jerky Vendor: Improve prices when purchasing from vendors.Tesla Science: Add 5% to your energy weapon.Total Hack: Hack through Protectrons, spotlights, and turrets.Tumblers Today: Bonus on lockpicking.U.S. Covert Operations Manual: Improved sneaking.Unstoppables: Add 1% percent of avoiding all damage from an attack.Wasteland Survival Guide: Collect extra meat from all animal kills.
Traders
Traders can be found at the following locations:
- Blake Abernathy and Connie Abernathy: Lexington and Northwest Commonwealth, Abernathy FarmBluejay and Rowdy: Quincy and Southern Commonwealth; Atom Cats GarageDeb, Joe Savoldi, Kay, Tony Savoldi: Neighborhood; Charlestown, Bunker HillJohn: Neighborhood; the Fens, Cathy & John’s Super Salon – Diamond CitySolomon: Neighborhood; the Fens, Chem-I-Care – Diamond CityPolly: Neighborhood; the Fens, Choice Chops – Diamond CityHenry Cooke: Neighborhood; the Fens, Colonial Taphouse – Diamond CityArturo Rodriguez: Neighborhood; the Fens, Commonwealth Weaponry – Diamond CityDoctor Patricia, Deezer, Penny Fitzgerald, Talia McGovern: North Central Commonwealth, CovenantMyrna: Neighborhood; the Fens, Diamond City Surplus – Diamond CityDoctor Sun: Neighborhood; the Fens, Doc Crocker’s House – Diamond CityTrudy: Lexington and Northwest Commonwealth, Drumlin DinerVadim Bobrov and Yefim Bobrov: Neighborhood; the Fens, Dugout Inn – Diamond CityBecky Fallon: Neighborhood; the Fens, Fallon’s Basement – Diamond CityFinch: North Central Commonwealth, Finch FarmBean, Crisp, Danny, Reg, Sprocket, Waitron: North Central Commonwealth, Atomics GalleriaKL-E-0, Daisy, Whitechapel Charlie, Rufus Rubins, Clair Hutchins, Fred Allen: Neighborhood; Financial District, GoodneighborRobots: Western Commonwealth, GraygardenKawolski: Neighborhood; the Fens, Klean Watur – Sheng Kawolski’s House – Diamond CityTheodore Collins and Rylee: Coastal Commonwealth, Longneck Lukowski’s CanneryTakahashi: Neighborhood; the Fens, Power Noodles – Diamond CityTinker Tom and Doctor Carrington: Neighborhood; North End, Old North ChurchKnight-Captain Cade and Proctor Teagan: Coastal Commonwealth, PrydwenTrader: North Central Commonwealth, Rotten LandfillScrap Merchant: Ramp overlooking the forest.Leonard Moore: Coastal Commonwealth, Shanty StoreTrader: Lexington and Northwest Commonwealth, Small Trading ShackMoe Cronin: Neighborhood; the Fens, Swatters – Diamond CityRonnie Shaw: Neighborhood; South Boston, the CastleSynth Food Vendor and Institute Requisition Vendor: Neighborhood; Cambridge, the InstituteDeidre: North Central Commonwealth, the SlogJune Warwick: Quincy and Southern Commonwealth, Warwick HomesteadAlexis Combes, Maria Summerset, Horatio, Dr. Penske: Western Commonwealth, Vault 81Random Trader: Lexington and Northwest Commonwealth, Trader’s Shack – West of Ranger CabinEleanor: Quincy and Southern Commonwealth, the Trading Post
Five giant creature locations
Go to the indicated locations to fight five Behemoths or Mirelurk Queens. They are the strongest enemies in the game and drop some rare loot. Bring a mini-nuke launcher (Fat Man) or rocket launcher and wear Power Armor. Otherwise, they may one-hit kill you if you are underleveled. These Bosses do not respawn. You will also encounter some of them during quests. As long as you land the final shot, it will count towards the “…The Harder They Fall” achievement.
Note: This procedure involves editing a game file; create a backup copy of the file before proceeding. Use a text editor to edit the “Fallout4.ini” and “Fallout4Prefs.ini” files in the “\Users\[username]\Documents\My Games\Fallout4\ ” directory. Find the [General] section and add the line “SIntroSequence=1” in both files.
Surviving long falls
Save the game just before hitting the ground after falling from a fatal height. Then, load the saved to land safely on the ground.
Repairing, upgrading, and painting Power Armor
Power Armor provides a lot of protection and makes the game much easier. However, the armor breaks after a while and you will have to repair it at one of the Power Armor stations. The first station is found in Sanctuary. Repairs only cost steel, which is easy to come by. You have to go there while inside your Power Armor and put it near the station. Going there without your armor does nothing. Painting it in new colors does not just change the look, but it also provides bonuses such as increased charisma or perception. Upgrading it obviously increases the armor rating, but requires the Science and Armorer perks.
Completing “Road To Freedom” quest
The “Road To Freedom” quest is required to find and join the Railroad faction and progress in “The Molecular Level” main quest. You will get the “Tradecraft” achievement for joining the Railroad faction. This quest can be tricky due to the lack of waypoints and map markers. The quest can be started by either overhearing people in Diamond City Market or by progressing in “The Molecular Level” main quest. To overhear people talking about it (may need to be done at night), when you enter Diamond City Market, take the far left path to “Third Detective”, then turn right to find a guy welding and talking to another guy about the Railroad. The first waypoint at Park Street Station will be displayed on your map. Normally the quest tells you to follow some lanterns and pick up password pieces along the way, but you can skip those tasks, unless you want the waypoint to Old North Church to appear on the map. Otherwise, just head directly to Old North Church, in the northeast. Go to the basement and locate the crest that says “Boston: The Freedom Trail”. Use the “Freedom Trail Ring” to enter the password “Railroad” to get in. To actually join the Railroad faction, you must complete the “Tradecraft” follow-up quest. The quest is given to you by Deacon after your first talk with the Railroad leader.
Easy “Benevolent Leader” achievement
To reach Maximum Happiness in a large settlement, choose Sanctuary, as it is a large settlement. Get your Charisma rank to 10 to bring in 20 settlers (it works with fewer people and less charisma, but it will go faster with more people). Have 20+ beds inside buildings, 20+ water, 20+ food, 140+ defense, 20+ surgery centers (tier 3 clinics). The key is to build the tier 3 clinics. Each one costs 1,800 bottle caps (use the “Infinite caps and items” glitch to make it easier), but they give by far the biggest boost to your settlement’s happiness. Building tier 1 and 2 clinics will not be enough, as you will get stuck at 94 happiness or so. Assign 3-4 people to food production — so your food status is not shown in red. Assign everyone else to work at the Surgery Centers. Every single person in your settlement must be working. Only build turrets for defense. Do not build guard posts that require people, as you need them in the clinics. Once you have everything set up, just stay at your settlement until happiness reaches 100 to get the “Benevolent Leader” achievement. It takes between 2 and 10 hours of real time. Make sure to not leave your settlement, as leaving the settlement sometimes randomly decreases happiness. It goes a little bit quicker if you sleep for 24 hours, then wait a few minutes until happiness increases and sleep again. But sleeping is optional, as you can simply leave the game running if you want. Also, make sure there is not a warning sign behind any of the settlement stats in the workshop section of your Pip-Boy.
Upgrade the “Local Leader” perk to the second level and build stores such as bars, clothing shops, or clinics to increase happiness. This is the only thing that will increase the satisfaction of the settlers. Build as many of those stores as possible. Do not build weapon, armor, or general traders buildings.
Easy “Future Retro” achievement
Holotape games can be played at Recreation Terminals. There is one at the beginning of the game, when you enter Vault 111. It is in the kitchen on the lower floor. You can either pick it up when you first visit the vault, or return later at any time. As soon as you start the Holotape Game, you will get the “Future Retro” achievement. You do not have to complete it. You can collect the Holotape games from terminals to play them later in your Pip-Boy.
Easy “Homerun!” achievement
This can be done in Diamond City Market. You will reach Diamond City in the first few hours of progression in the main quest. There are four markers/plates on the ground. You need to walk over all of them in the correct order. When you enter the Diamond City Market, walk straight forward and over the first plate with a diamond on it next to a blue board. Next, walk to the right and stay to the left and go up a few steps to find the next plate with a “I” on it. Continue along the path to find another plate with a “II” on it. Continue further along the path to find another plate with a “III” on it. Finally, take the path left to return back to the first plate. Walk over all of these plates in that order to get the “Homerun!” achievement.
Easy “Mercenary” achievement
Miscellaneous objectives are found by talking to shop owners in the commonwealth (Diamond City, Goodneighbor, Atomic Cats Garage, Bunker Hill, The Slog, etc.). Others can be randomly obtained after joining the Minutemen, getting some settlements, and defending them. Purchase a house in Diamond City for 2,000 caps after talking to the Mayor’s secretary to get another miscellaneous objective to visit that house. Also, talk to the secretary and choose the “Job” option to get a miscellaneous objective to find the wanted board. The wanted board then has additional miscellaneous objectives on it.
Easy “Prankster’s Return” achievement
First, buy the Pickpocket Perk (Rank 2) in the Perception skill tree. Rank 2 of this perk allows you to place a live grenade in someones inventory and increases the chance of success by 50%. You can find or buy grenades. For example, several merchants in Diamond City Market sell fragmentation grenades. You will reach Diamond City in the first few hours of progression in the main quest. Once you have the grenade and perk, enter sneaking mode and approach someone from behind, then select the mine from your weapons to place it on the other person. The mine will explode and you will get the “Prankster’s Return” achievement. Make sure you create a manual save game before doing this so you can reload it to get your skill points back.
Easy “Touchdown!” achievement
To get the “Touchdown!” achievement, you must get killed by a “Super Mutant Suicider”. They spawn in many parts of the Commonwealth. You are likely to get this achievement without even trying while progressing through the game. They are easy to spot because they have a red, blinking bomb with them. They come running towards you and blow themselves up. There is one in a train wreck in the south of the map, between Somerville Place and Hyde Park.
Steam achievements
Successfully complete the indicated task to unlock the corresponding achievement. To view your achievements and stats in Steam, select “Community”, “My profile”, “View all my games”, then the game and view stats.
- War Never Changes: Enter The Wasteland.When Freedom Calls: Complete “When Freedom Calls”.Unlikely Valentine: Complete “Unlikely Valentine”.Reunions: Complete “Reunions”.Dangerous Minds: Complete “Dangerous Minds”.Hunter/Hunted: Complete “Hunter/Hunted”.The Molecular Level: Complete “The Molecular Level”.The Nuclear Option: Complete “The Nuclear Option”.Institutionalized: Complete “Institutionalized”.Mankind-Redefined: Complete “Mankind-Redefined”.Powering Up: Complete “Powering Up”.Nuclear Family: Complete “Nuclear Family”.The First Step: Join the Minutemen.Taking Independence: Complete “Taking Independence”.Old Guns: Complete “Old Guns”.Semper Invicta: Join the Brotherhood of Steel.Blind Betrayal: Complete “Blind Betrayal”.Ad Victoriam: Complete “Ad Victoriam”.Tradecraft: Join the Railroad.Underground Undercover: Complete “Underground Undercover”.Rockets’ Red Glare: Complete “Rockets’ Red Glare”.Sanctuary: Complete “Sanctuary”.Community Organizer: Ally with 3 Settlements.Benevolent Leader: Reach Maximum Happiness in a Large Settlement.Gun-For-Hire: Complete 10 Side Quests.Mercenary: Complete 50 Misc. Objectives.Scavver: Gather 1000 Resources Used For Crafting.What’s Yours Is Mine: Pick 50 Locks.RobCo’s Worst Nightmare: Hack 50 Terminals.Armed and Dangerous: Create 50 Weapon Mods.Wasteland D.I.Y.: Craft 100 Items.Never Go It Alone: Recruit 5 Separate Companions.Lovable: Reach Maximum Relationship Level with a Companion.Fix-Er-Upper: Build 100 Workshop Items.Future Retro: Play a Holotape Game….The Harder They Fall: Kill 5 Giant Creatures.Ranger Corps: Discover 100 Locations.Print’s Not Dead: Read 20 Magazines.Prankster’s Return: Placed A Grenade Or Mine While Pickpocketing.Masshole: Kill 300 People.Animal Control: Kill 300 Creatures.Homerun!: Get a Homerun.Touchdown!: Get a Touchdown.They’re Not Dolls…: Collect 10 Vault-Tec Bobbleheads….They’re Action Figures: Collect 20 Vault-Tec Bobbleheads.Born Survivor: Reach Level 5.Commonwealth Citizen: Reach Level 10.Unstoppable Wanderer: Reach Level 25.Legend Of The Wastes: Reach Level 50.Prepared for the Future: Decide the Fate of the Commonwealth.
Under Creative Commons License: Attribution Non-Commercial No Derivatives